- HubPages»
- Arts and Design»
- Graphic Art & Design»
- Design Software
Fun Fiery Text Effect in Adobe Photoshop


Practice Makes Perfect
Working with Photoshop text can be fun and very rewarding in certain visual messages or advertisements. Understanding the Photoshop program was one obstacle that took a little longer for me to learn. I found unless you give yourself small achievable projects like this one, what you learn doesn’t stay with you. This step-by-step procedure will explain how easy it is to create a fiery text effect in Photoshop.
I have Adobe Photoshop Creative Cloud, but I did this effect in an older version of Adobe Photoshop CS5. I believe you can do all these effects in even older versions of Photoshop as well.
Step 1.
Open a new document in Photoshop. You can use any setting you wish but I am using the following settings set to 6 inches by 6 inches and desired resolution value. I will use 300 dpi. Click Ok.

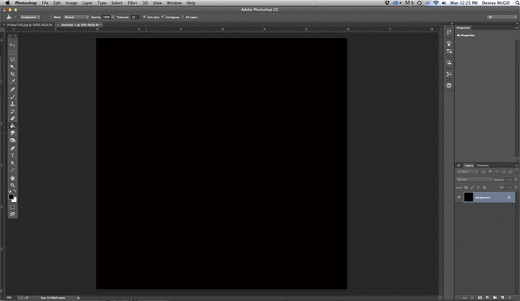
Step 2.
Next set your background layer to black. You can do this a number of ways. You could use the Paint Bucket tool in the left-hand bar, set the color pallet to black and click in your artboard. Or by going to the edit menu and choose fill or (shift+F5) and set content to black. Click Ok.
Do you like to play with Photoshop?

Step 3.
Next, you’re ready to type in your desired text by clicking the type tool or selecting T on the keyboard.
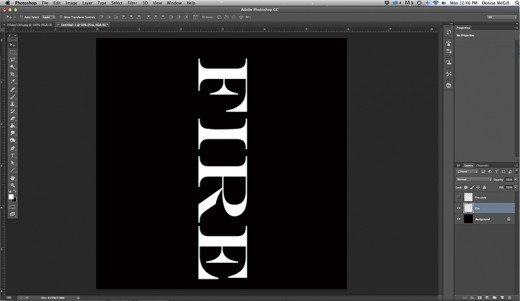
With the type tool selected, select your font choice on the options bar at the top of the screen. Serif fonts tend to work best for this demonstration so I chose Engravers MT. I could have also used Times New Roman Bold. Size is your choice but I chose 120pt.
At this moment the foreground, in the lower-left box on the toolbar is set to black and the background color is set to white. This is opposite of what we need because you want your text to be white. Therefore, press the letter X on the keyboard to swap them. Now the foreground color should be set to white as seen in the toolbar to the bottom left.
With your type tool selected, font is chosen, and your foreground color set to white you can type your desired text on to your document. I chose to type the word “FIRE” in all capital letters.
If can use Free Transform to resize your text by going to Edit on the menu bar and selecting Free Transform or Control/Command+T. While holding down the shift key resize your text by pulling any square on the box in the desired direction until the size is reached. To move the text click anywhere inside the box and drag to the desired location. I moved my text to the bottom center of my document. When done accept the transformation by clicking the checkmark at the top of the menu banner and exit. You can also accept clicking enter on the keyboard.
Step 4.
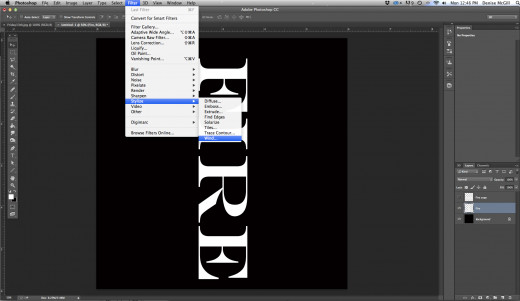
Now we want to convert our text to pixels. To do this go to the Layer menu at the top of the screen and choose Rasterize, then choose Type.
In the layers palette, you will notice that the text layer directly above background has been changed to a normal, pixel-based layer. Now create a copy of this layer by making sure the layer is selected then press Control/Command+J.
Step 5.
Turn the copy off by press the eye icon to the left of the layer box. The eye should disappear and the copy will disappear from the document screen, but it is still there whenever you turn the eye back on.
Step 6.
Click on the original text layer in the layer palette to select it to design the fire.
We will first need to rotate the image in order to use the wind filter, which only works left to right or right to left. Go to Image on the menu bar and select Rotate Canvas and then choose 90 degrees CW (clockwise).
Step 7.
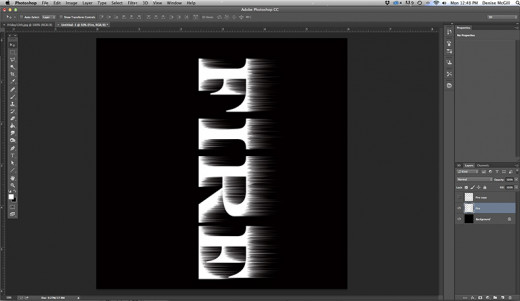
Next, go to Filter on the menu bar and select Stylize and then Wind. Once the Wind dialogue box appears select Wind from left. Then click okay. You should see small streaks extending from your letters. To make the streaks bigger press Control/Command+F about twice to apply the filter two more times and make the streaks much longer. Then rotate your image back to its original position by rotating the canvas 90 degrees CCW in the Image menu.
Step 8.
Soften the streaks by blurring them a little. Go to Filter on the menu bar and select Blur, the Gaussian Blur and change pixels to 1.4. Now click ok to close the box.
Step 9.
In the layer palette select the background layer and copy it; Control/Command+J.
Next, merge the Background copy layer to the text layer directly above it by clicking on the text layer to activate it. Then go to the layer menu on the menu bar and select merge down. The two layers should now be merged.
Step 10.
To illuminate confusion rename the background copy layer to “Flames” by double-clicking on the words “background copy” in the layer palette.
Step 11.
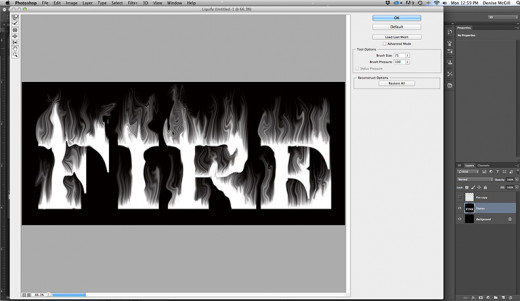
On your toolbar select the rectangle marquee tool. Click and drag a rectangle around your text to include your created streaks and leaving room at the top for your flames that you will be creating next. With the area still selected go to the menu bar and select Filter and then Liquefy.
This brings up the Liquefy Filter. Choose the warp tool in the top left corner. On the right in the tools options leave the brush size at 100. The click with your mouse inside your streaks and drag them a short distance left or right to give them a gentle warp, wavy look. Click, drag, and release your mouse randomly over all the streaks to include the ones in the middle and on the bottom. Try not to warp the letters at this stage.
The go back to the brush size and choose a smaller size. I chose 15. This time click inside your letters and drag upwards in random spots making little shooting flames. Make more interesting flames by wiggling your mouse a little as you drag it.
Now choose a larger brush size. I chose 50. Now make even larger flames on the top, middle and bottom of your letters. Be creative and drag upward in different directions. Click ok to exit the Liquefy box. You now have text engulfed in a white blaze. Click Select>Deselect to exit the marque tool or Control/Command+D.
Step 12.
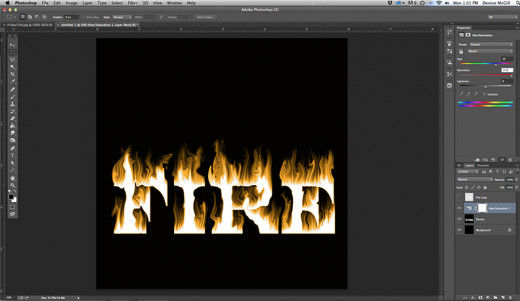
To add color go to the layer palette and click on the new adjustment layer icon, then select Hue/Saturation. Select the Colorize option, and then select 40 for the Hue and 100 for Saturation. Then exit the box by selecting close.
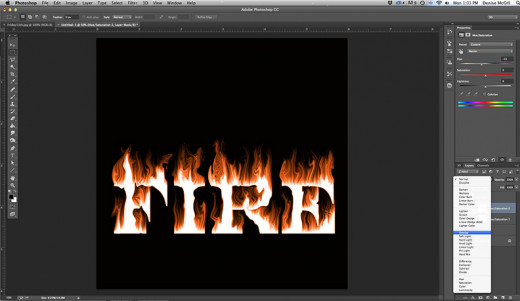
Step 13.
To add a second layer of color, select a new adjustment layer and Hue/Saturation. This time leave the Colorize option unselected and set the Hue to -15 and exit the dialogue box. On the second new adjustment layer change the Blend Mode in the top left corner of the Layer palette from Normal to Overlay.
Step 14.
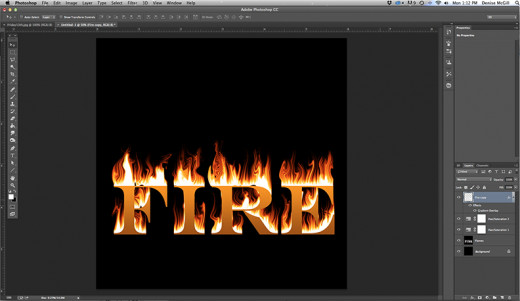
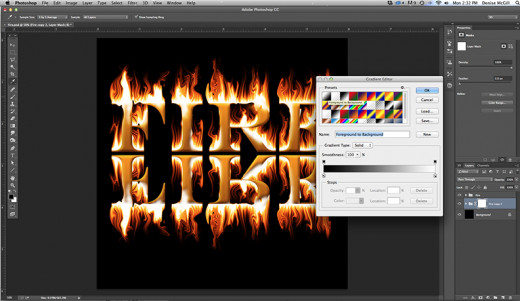
Now turn on the text layer that we previously turned off by first clicking on it to activate it and then click the eye to make it visible again. Then click on the Layers Styles palette at the bottom of the Layer panel and choose Gradient Overlay. Click on the Gradient bar in the center of the display. This will open up the Gradient Editor.
Click on the bottom left color stop square and then click on the Color Swatch at the bottom of the dialogue box. Click a dark orange/brown color for the bottom of the letters. Click ok to exit the Color picker.
Back at the gradient editor click on the color stop on the bottom right side and then click on the Color Swatch, this time choose a bright orange color for the top of the letters. Click ok to close the Color picker.
The only box left open is the Layer Style box. Make sure your style says linear and the “align with layer” box is checked. The angle of the gradient should be set to 90 degrees. Click ok.
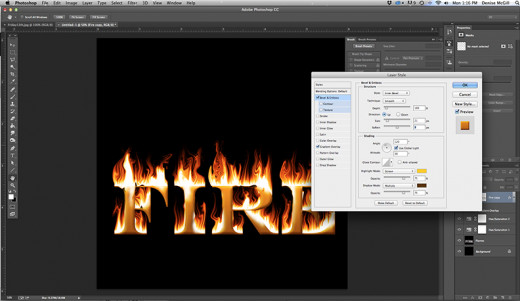
Before turning my Layer Style box off, I added a little extra by clicking on Bevel and Emboss to add a little 3D quality to the letters. I changed the shadow from black to dark brown and the highlight color from white to bright yellow. I increased the size to 21 and the soften size to 8 pixels.
Step 15.
You can stop here or go a little further to blend the fire with the text. With the text layer selected, click on the layer mask at the bottom of the layers palette. Grab the brush tool from the toolbar or press B on your keyboard. Make sure your foreground color is set to black as can be seen in the color swatches on the toolbar. Resize your brush to the smallest size by pressing the left bracket next to the letter P on the keyboard. As you paint the edges of the letters the flames will appear as the edges disappear. This will give the illusion that the letters themselves are on fire. To remove the orange bar at the bottom edge of your letters press the letter V on the keyboard and the down arrow key once or twice until the letters and the flames line up.
Step 16.
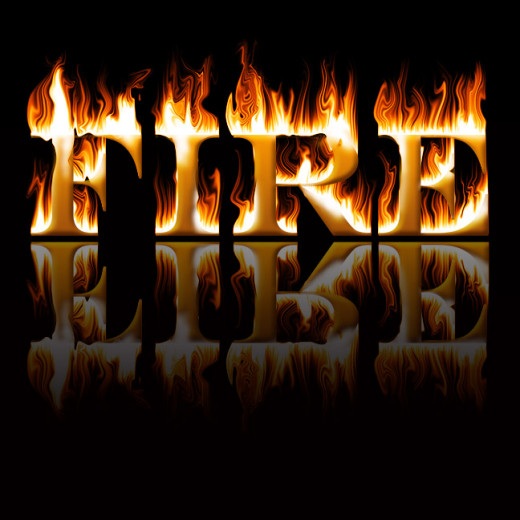
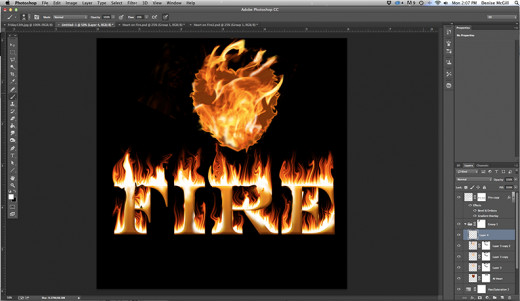
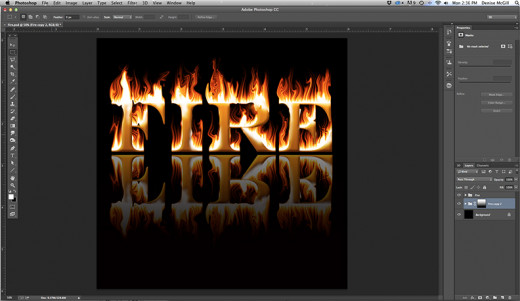
One more added little extra would be a reflection on the table. To get this make a copy of your current layers and reverse it. I did it by grouping the layers together all except the background layer. Then duplicate the group by going to Layer>Duplicate Group and renaming it to Reflection, then clicking okay. Drag this layer under the Fire group and reverse it by going to Edit>Transform>Flip Vertical. Go to the Fire group and change the Blend Mode to Lighten. Then add a mask layer to the Reflection layer and click on the gradient icon, choose black to white and drag the tool down to lighten up the reflected later.
This technique can be used in any type of graphic that you may want to create for something dramatic; you can even change the colors in Step 12 so the fire is different colors or multicolored if you like.