A Portrait, Start to Finish

Portraits for Feeling
I’ve been doing portraits for a while now and I find them fun for me and fascinating for an audience. Each face is different, of course, but more than that. Each face has feeling and emotion. It is more than the outward look of a person. It also has all that person’s life experiences and emotions, hurts and joys, etched in it. If I cannot make that come across somehow, I have failed. You see a photograph can capture the image of a person. Only an artist can capture the essence of the person if that’s possible. I try to get the personality, the emotion, the person behind the person.
My photos for this concept
Start With Good Photos
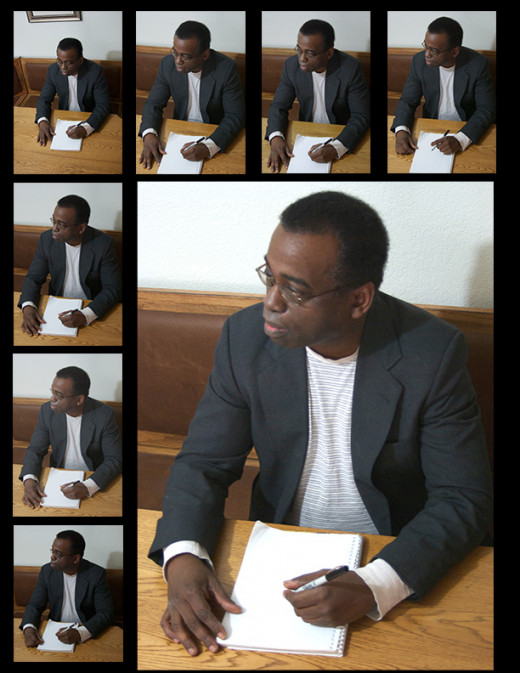
For this portrait, I started where I usually start with a concept. This is my husband. He is a writer, actor, drama director, pastor, counselor, a really great guy, and so much more. He is most happy when he is writing and counseling people. My concept was of him for this portrait is as a writer. He likes to scribble his ideas out longhand on paper. I wanted to look down on him from above for this because he is so often writing about lofty and godly things and I wanted to see him as God sees him. I set up my lights and stood on a chair to get several photograph images of him. Later I chose the one I liked best and corrected the lighting a little.
Finished Pastel Study
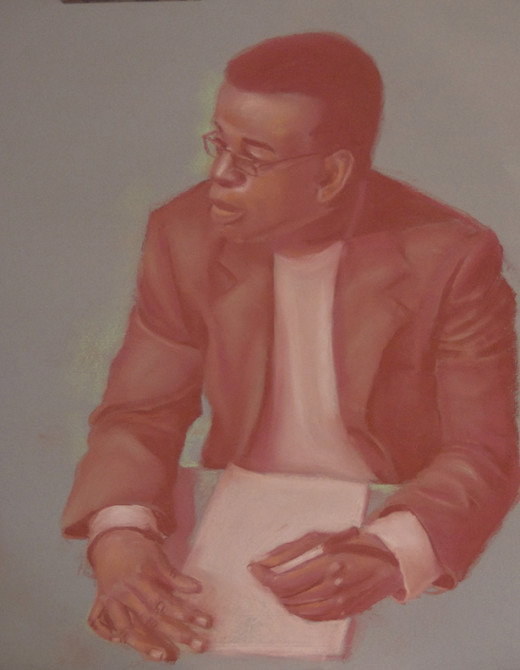
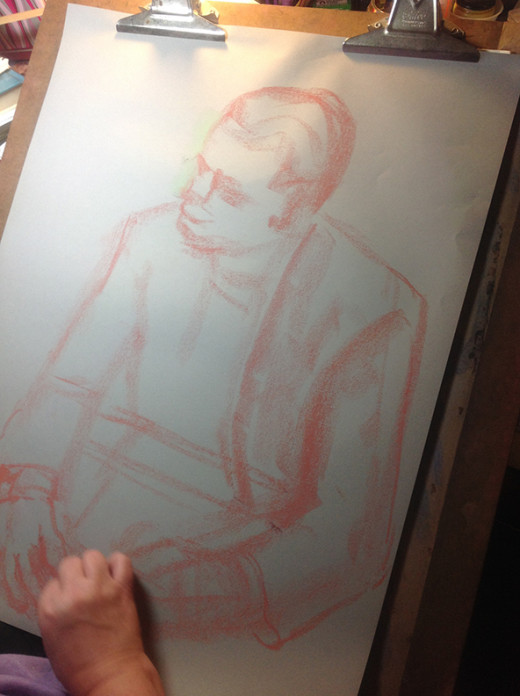
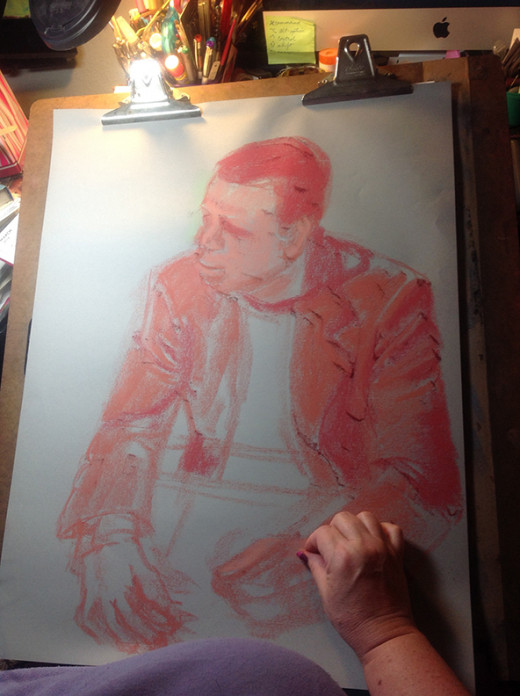
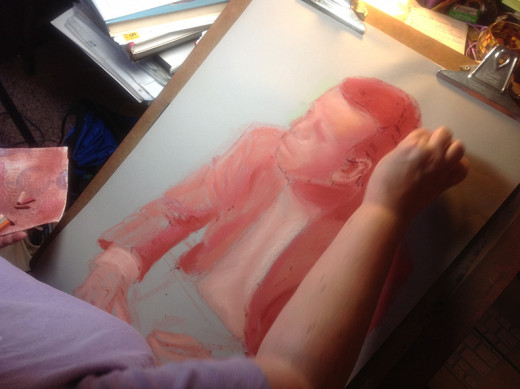
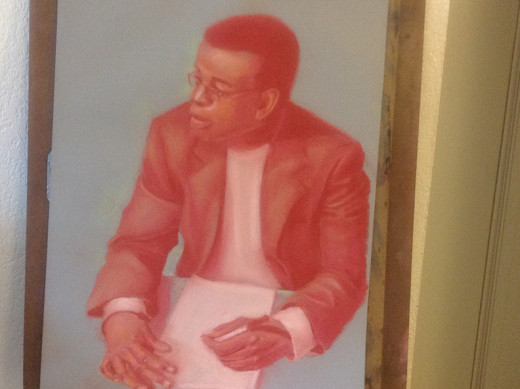
Start With A Study In Pastel
The next step was to make a preliminary drawing in pastel. It is always easiest to capture all the necessary elements in monochrome. I worked with reds and sanguines on a grey-toned paper, using a light green to correct anything outside the lines that I didn’t want to show.
Start by defining the outline of the portrait as if it were a silhouette. Slowly fill in the large shapes using the medium-light red color and build up to the darks. Each layer adds a little more detail to the subject until you have a soft portrait. Next, the lights, highlights and deep lines for detail like eyelashes and eyebrows are added. Along the way, I added a green to “erase” or mask parts of the red that escaped the outline. The green has to be added sparingly because it can overpower the whole piece if you bear down on the pastel.
After I stood back from the piece I could tell I had made his fingers on the right hand too long. This is something I will correct for my collage portrait.
Now I’m ready to start my portrait.

Pastel Portrait
Click thumbnail to view full-size


Would you have a portrait done if you could afford it?
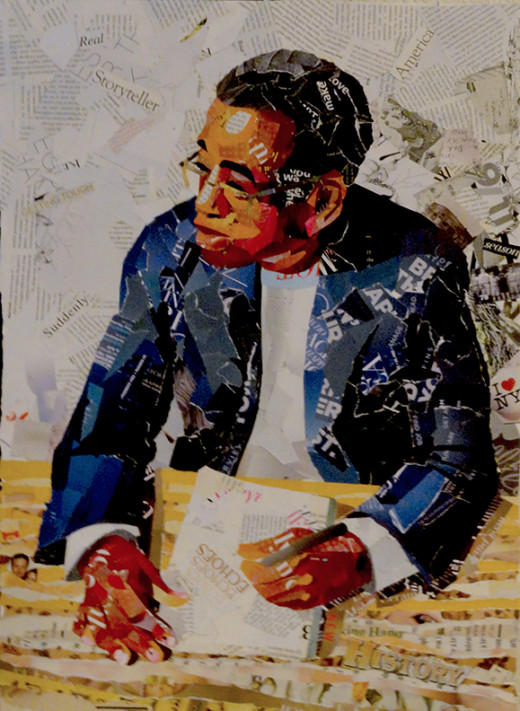
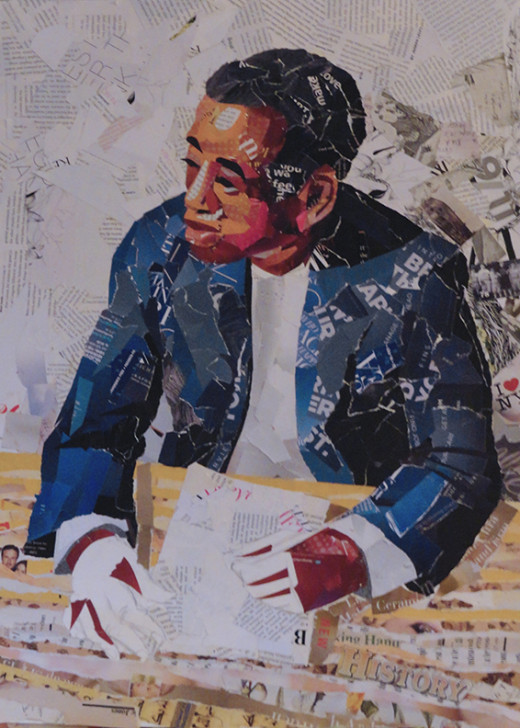
Torn Paper Collage
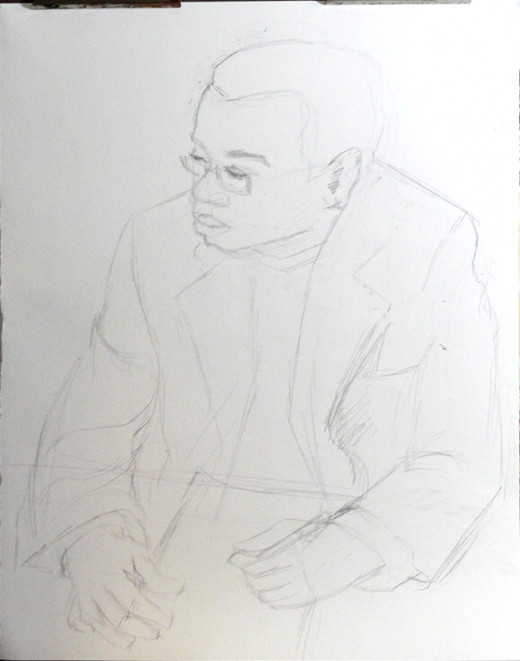
I decided to do this portrait using my torn paper collage effect. It is quite versatile and intriguing when done. I’ve won many awards with this effect and really like working this way. I have found it to be fun for me and less messy except for the little pieces of cut and torn paper. It is ecological as I’m recycling old magazines and catalog pages to make my art. I could do the portrait in watercolor or oils but I chose the torn paper collage to get a loose feel. I start with a drawing and begin gathering my colors.
Start With a Pencil Sketch on the Paper

Gather Colors
Gathering just the right colors is the hardest part. I had to dig through a number of magazines and brochures to find just the right reds and oranges for the face, not to mention the blues and greys for the jacket. I wanted to keep some of the wood grain looks of the tabletop so I chose to do it in shades of tan and pale yellow.
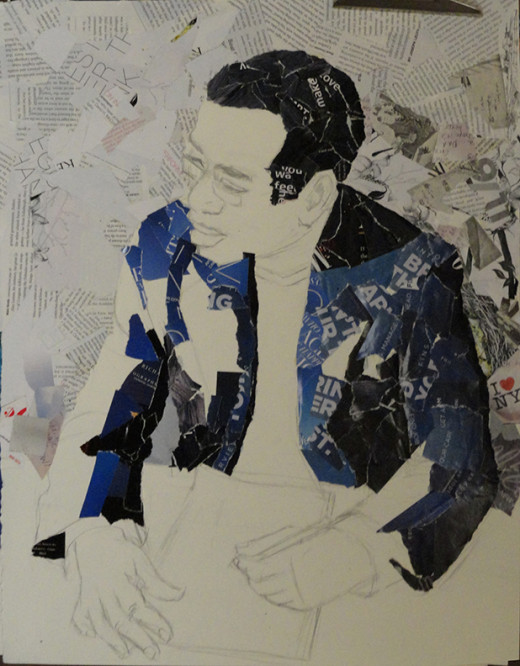
Background
I like to start with the background. It makes it easier to place the important subject pieces on top to cover any overages the background pieces make. I often lose my pencil lines in this way but I don’t find it hard to find them again. I remember where they are. After I’m done I will go back and add a few cut-out and saved words and messages to the background, but for now, it is just the flat colors. Also, nothing in space is completely one flat hue. Space and distance, not to mention light and shadow, change the colors. Even if the wall were a flat white, it would appear darker the farther away from the light source it got. Keeping this in mind I used several “shades” of grey to get my background.
Jacket and Face Colors
Jacket
Next, I lay in the jacket and the face colors. Sometimes I cut pieces to fit exactly but most of the time, I like to tear the paper. I like the softness of the freighted edges. When the details get too small for tearing I have to get the scissors out. Notice I am not bothering with the glasses. Not yet. I’ll place them on his face last. It is easier to make the face right and then add glasses on top than to try to put on glasses and make the face right under them.
Hands and TableTop
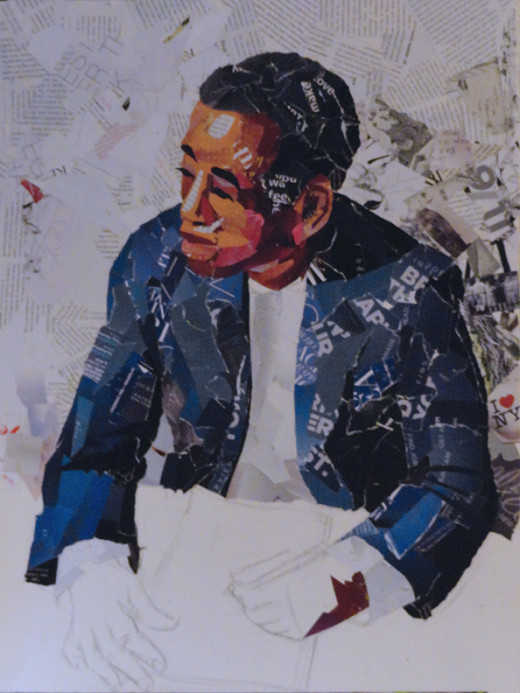
Hands
After the face colors are added, I begin working on the hands. The colors have to be similar but not always the same as for the face. The hands and fingers have smaller planes and sharper turns from light to shadow than the face has. Most of the fingers have to be cut rather than torn. Also on average, the hands tend to be a little bit darker (suntanned) than the face is.
TableTop Extension
Next, I started working on the tabletop colors. I wanted to keep the wood grain look and used light yellowy-tan colors because yellow goes well with the blues I used for the coat.
After a while working on the tabletop, I decided to add a couple of inches at the bottom of the page to give room for the frame and matte I will be using later. I can always trim away excess later but it will be harder to add length unless I do it now as part of the process. Being that this is collage, gluing on a couple of inches of length is no problem.
Finish Hands and TableTop Extension

My Honey Likes It
As it flows along, I am really starting to like it. My husband walked by the easel and mentioned that he looks better in torn paper than in real life. I think he looks pretty good both ways.
I still had to do some facial corrections on the nose and chin plus the glasses, and a little adding of keywords and images.
Finished

Ready for an Art Show
I hope you liked my process for this portrait. Thanks so much for taking a look. I’d love to hear your thoughts.